
Managing bookings and appointments
Artwin Live is designed to manage bookings, a live performance by an artist on a certain location at a specific moment. But also the artist related appointments, like a radio interview for instance. Within the application you find buttons to create a booking (option or confirmed) and an appointment. In the remainder of this article, we explain how to create a booking, the steps to create an appointment are almost the same.
Regular calendar applications, like the one on your mobile phone or online apps like Google Calendar, make use of 2 status types for appointments: Confirmed and Option. These applications are designed to manage any appointment, but makes no distinction between a booking and an appointment. In Artwin Live we use those two types to identify the status of a booking and added a third type Appointment to identify those.
Note: In this article, as we say "booking", we mean any of these statuses (confirmed and options).
Create a new booking
On the Dashboard in the top left corner you can see a button named Booking, and a button named Appointment.
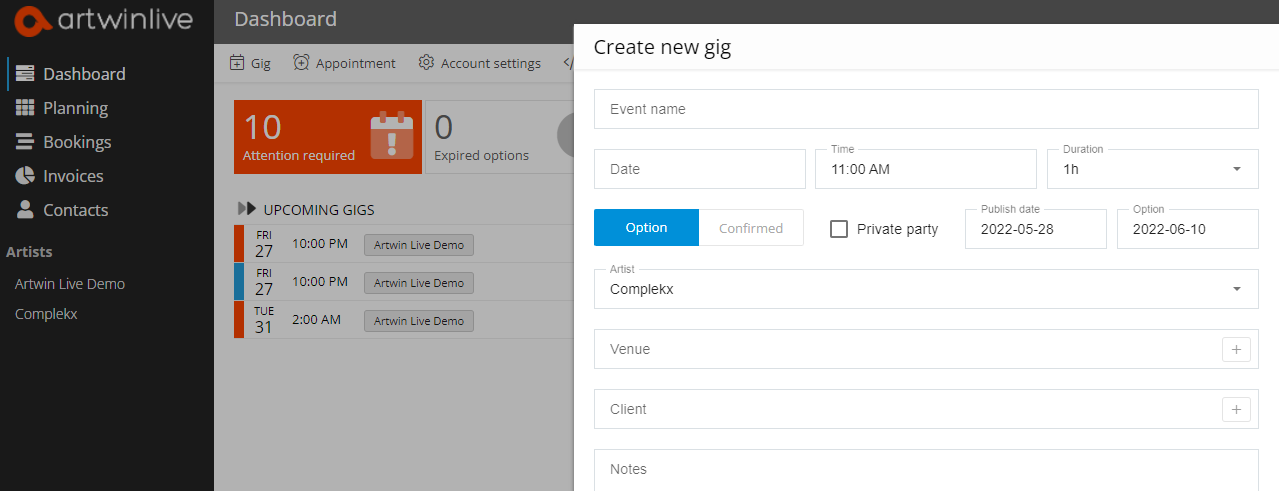
Event name
Enter the name of the event (or a descriptive title for an appointment).
Date and time
The start date and time of the event.
Important Note: The date field can be confusing in case of if an event starts after 12:00 AM (00:00 on 24h clock). It's generally accepted that if we say Saturday 1:00 AM, we actually mean Sunday 1:00 AM. You need to enter the real date in Artwin Live! In this case Sunday 1:00 AM.
In the Calendar setting in your Account settings, you can set before what time at night a booking will be shown as if at the previous day. Go to Account settings (login required)
Duration
The approximate duration. You must select an interval from the list. Choose "1d" (one day) for an All day event.
Tip: You may use the "1d" value if you do not know the actual performance time yet. In your calendar list, this booking will state "All day" instead of actual start and end time.

Status
Select the status of this booking. Please read the first chapter of this article about the booking status definitions.
If you select Option, you may also set if this booking is a private party. This means that the event is not publicly accessible (you cannot buy tickets for this event). Private parties will not be published on any website.
If you select Confirmed, the Private party field is a date picker field. Enter the date as from when the event will be made public or click "Private party" to never make it public.
Private / Public party + publication date
For options and confirmed bookings, you can set if the booking is during a private party. If you set the party to Public, then you can set the date as from when the event may be announced on Facebook, Twitter and your website via the widgets and announcement button.
Important Note: By default when you create a public booking, the publication date is set to one day after today (the day you created the booking), 12:00 PM GMT. That means that if today is March 12 and the publication date is set to March 13, it will be published at March 13, 12:00 PM GMT (not 12:00 PM the time zone you're in).
Option until
When a booking is still an Option, you can set the expiry date of the option. If you're using Professional or Agency Plan, you can monitor expired options in the Bookings section.

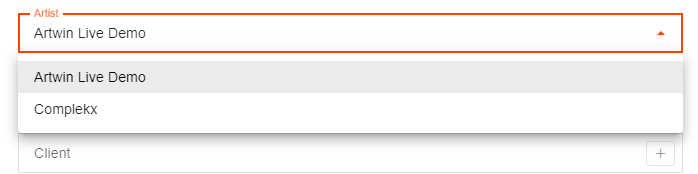
Artist selection
If you can manage bookings of more than one artist then you can select the artist this booking belongs to.
Important Note: If you've been invited as a group member by another user, note that you cannot add any bookings unless you create a schedule (artist) of your own. But be aware that other users cannot view that schedule unless you invite them.
Venue/Location
You can search for venues worldwide by typing the name and city of the venue and then select the venue from the drop-down list. If you cannot find the venue in the database, then click on the "Edit" button and enter the venue manually.
Promoter
Enter the details of the organizing party. Unlike Venue the Promoter search feature does not lookup businesses in an online database. If you've created bookings for an artist before then you can search for that promoter again by typing the name in this field.
Description
This is a private description. This data will not be published.
Save
When you're done click Save. They will appear on your screen. You can now add more details to the booking like ticket sale point, website and more. Please read the next section of this article.
Edit bookings
An existing booking contains at least 6 sections. General (The date, status, etc.), Venue, Promoter, Financial, Event and Itinerary. You can edit any section of an existing booking by clicking the Pencil-icon.
Event details
Event details are only required if the booking is not for a private party.
Itinerary and comments (and upload files)
You can create an itinerary (or comment) and upload files with each itinerary object.
Note: Please note that all data is visible to all team members (other Artwin Live users that are invited to view this artist schedule). "Personal comment" is an exception. This comment is only visible to you and you cannot view personal comments owned by other team members.
Change the status
There is probably one situation when the status of a booking changes. That is in case a booking is confirmed, it will change from Option to Confirmed. Then pay close attention to the Publish date field if the booking isn't at a private party.
Deleting bookings
To delete a booking. Open the booking edit screen, scroll down and press Delete. A booking will first be cancelled. When you delete the booking the next time in cackled status, it will be deleted permanently/.